How to Increase the size of a Linux LVM by adding a new disk
How to Increase the size of a Linux LVM by adding a new disk
As there are a number of different ways to increase disk space I have also posted some different methods here:
- How to Increase the size of a Linux LVM by expanding the virtual machine disk – In this article the virtual disk that is using LVM is expanded, whereas in this current article we are instead increasing the virtual disk and expanding the Linux native partition.
- Use GParted to increase disk size of a Linux native partition – In this article the virtual disk is expanded, however there is no LVM here just a Linux native partition that is expanded with the GParted live CD.
- How to Decrease the size of a Linux LVM – In this article the file system is shrunk followed by the LVM, allowing you to reclaim space in the volume group.
Throughout my examples I will be working with a VMware virtual machine running Debian 6, this was set up with a 20gb disk and we will be adding a new 20gb disk for a total LVM size of 40gb.
Although my examples make use of virtual machines, this method would work with a physical server as well if you have added a new physical disk in and want to use that to expand the LVM.
Identifying the partition type
As this method focuses on working with LVM, we will first confirm that our partition type is actually Linux LVM by running the below command.fdisk -l
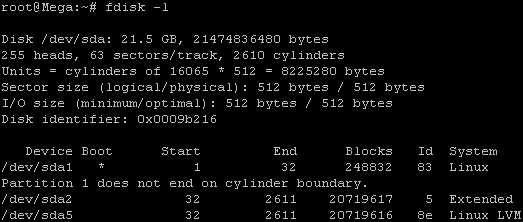
As you can see in the above image /dev/sda5 is listed as “Linux LVM” and it has the ID of 8e. The 8e hex code shows that it is a Linux LVM, while 83 shows a Linux native partition. Now that we have confirmed we are working with an LVM we can continue. For increasing the size of a Linux native partition (hex code 83) see this article.
Below is the disk information showing that our initial setup only has the one 20gb disk currently, which is under the logical volume named /dev/mapper/Mega-root – this is what we will be expanding with the new disk.
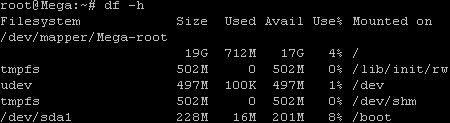
Note that /dev/mapper/Mega-root is the volume made up from /dev/sda5 currently – this is what we will be expanding.
Adding a new virtual hard disk
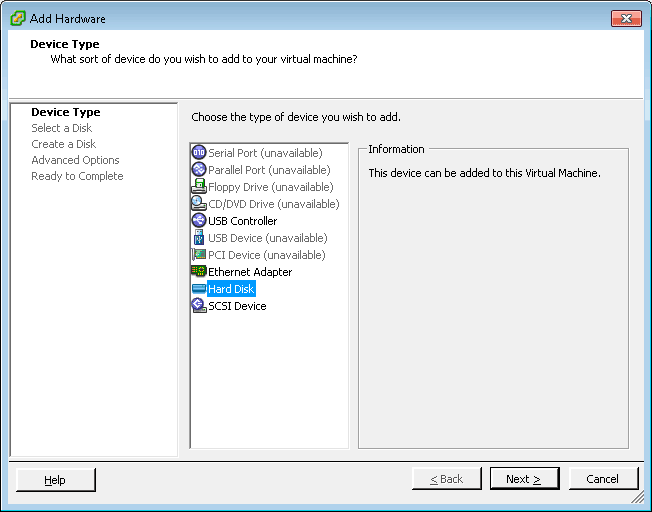
First off we add a new disk to the virtual machine. This is done by right clicking the virtual machine in vSphere, selecting edit settings and then clicking the “Add…” button which is used to add hardware to the virtual machine.Select hard disk and click next.
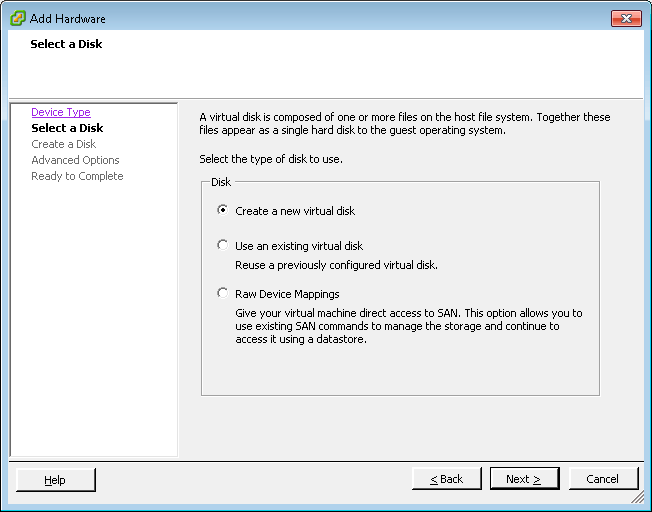
Select create a new virtual disk and click next.
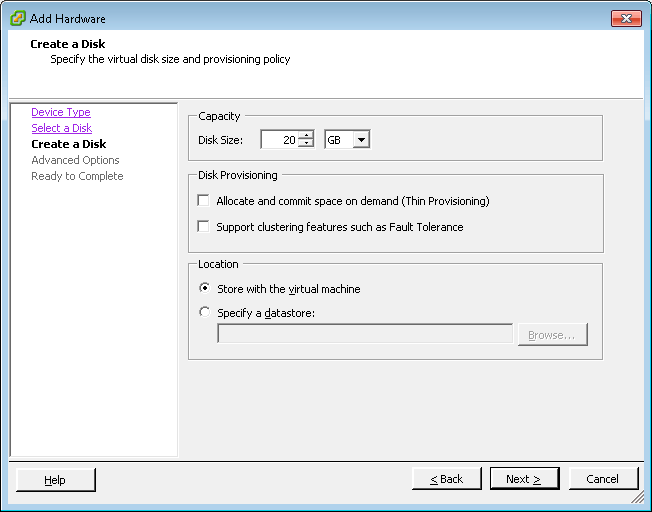
Select the disk size you want to add, I will be using 20gb as previously mentioned. I have also selected to store the disk with the virtual machine, it will store on the same datastore as the virtual machines files, this will be fine for my test purposes. Click next once complete.
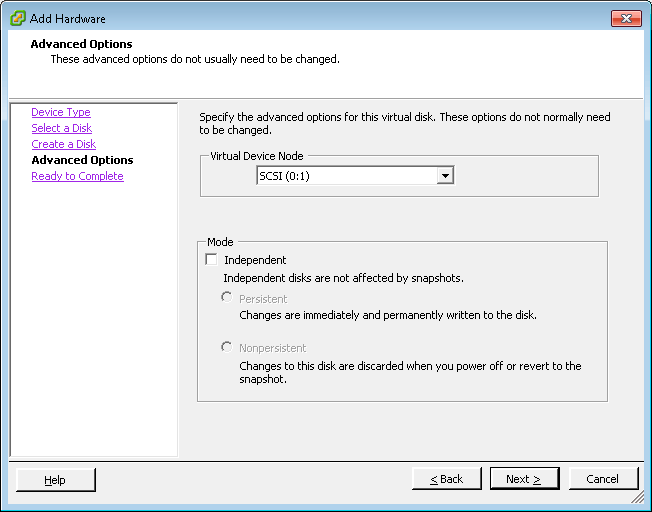
Select next on the advanced options page.
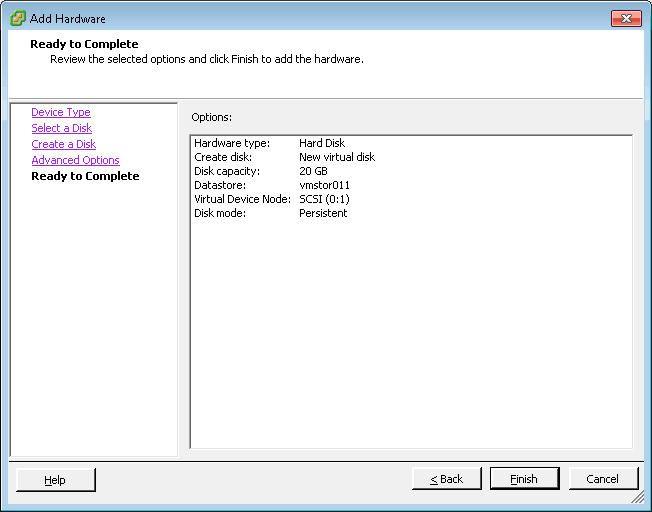
Review everything and click finish once you have confirmed the settings.
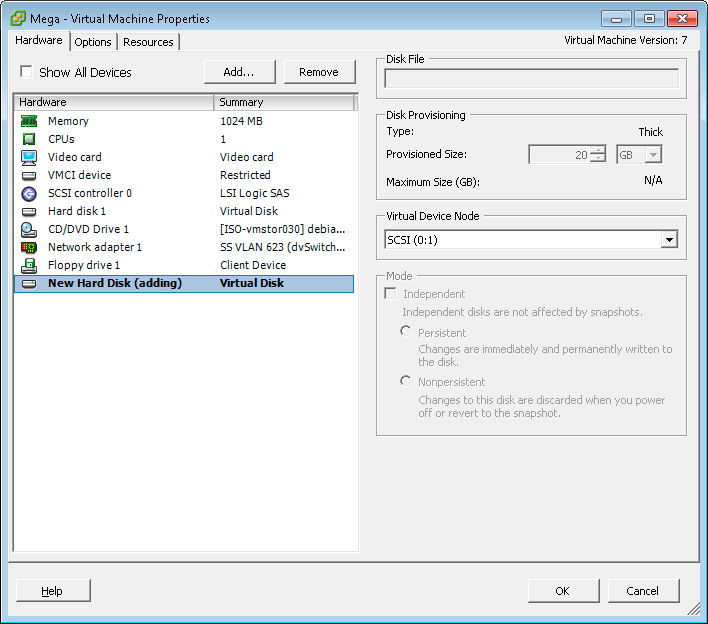
You will then see the new disk under the hardware devices tab and it will be labelled with (adding) which means it will not apply until you click OK, so click OK to complete the process.
Detect the new disk space
In my test for this example, as soon as I added the additional disk in through VMware it displayed through “fdisk -l” for me, you can see the second disk labelled /dev/sdb (I have cropped out the information on /dev/sda1 to make it less cluttered here). It is also worth noting that it shows as not containing a valid partition table, we are about to set this up.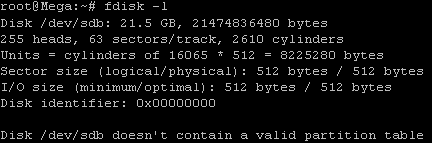
This may not however be the case for you, to avoid reboot you may need to rescan your devices, you can try this with the below command. Note that you may need to change host0 depending on your setup.
echo "- - -" > /sys/class/scsi_host/host0/scanIf you have issues detecting the new disk, just perform a reboot and it should then display correctly.
Partition the new disk
We now need to partition the new /dev/sdb disk so that it can be used, this is done by using fdisk.fdisk /dev/sdbThis should provide us with the below prompt, the inputs I have entered in are shown in bold.
‘n’ was selected for adding a new partition.
root@Mega:~# fdisk /dev/sdb
Command (m for help): n
‘p’ is then selected as we are making a primary partition.
Command action
   e   extended
   p   primary partition (1-4)
p
As this is a new disk, we do not yet have any partitions on it so we will use partition 1 here.
Partition number (1-4): 1Next we press the enter key twice, as by default the first and last cylinders of the unallocated space should be correct.
First cylinder (1-2610, default 1): "enter"
Using default value 1
Last cylinder, +cylinders or +size{K,M,G} (1-2610, default 2610): "enter"
Using default value 2610
‘t’ is selected to change to a
partitions system ID, in this case we change to ’1′ automatically as
this is currently our only partition.Command (m for help): t Selected partition 1The hex code ’8e’ was entered as this is the code for a Linux LVM which is what we want this partition to be, as we will be joining it with the original Linux LVM which is currently using /dev/sda5.
Hex code (type L to list codes): 8e
Changed system type of partition 1 to 8e (Linux LVM)
‘w’ is used to write the table to disk and exit, all changes that have been done will be saved and then you will be exited from fdisk.
Command (m for help): w
The partition table has been altered!

Calling ioctl() to re-read partition table.
Syncing disks.
By using “fdisk -l” now you will be able to see that /dev/sdb1 is listed, this is the new partition created on our newly added /dev/sdb disk and it is currently using all 20gb of space.

Increasing the logical volume
Next we will use the pvcreate command to create a physical volume for later use by the LVM. In this case the physical volume will be our new /dev/sdb1 partition.root@Mega:~# pvcreate /dev/sdb1 Physical volume "/dev/sdb1" successfully createdNow we need to confirm the name of the current volume group using the vgdisplay command. The name will vary depending on your setup, for me it is the name of my test server. vgdisplay provides plenty of information on the volume group, I have only shown the name and the current size of it for this example.
root@Mega:~# vgdisplay
  --- Volume group ---
  VG Name               Mega
  VG Size               19.76 GiB
Now using the vgextend command, we extend the ‘Mega’ volume group by adding in the physical volume of /dev/sdb1 which we created using the pvcreate command just before.
root@Mega:~# vgextend Mega /dev/sdb1
  Volume group "Mega" successfully extended
Using the pvscan command we scan all disks for physical volumes, this should confirm the original /dev/sda5 partition and the newly created physical volume /dev/sdb1
root@Mega:~# pvscan
  PV /dev/sda5   VG Mega   lvm2 [19.76 GiB / 0    free]
  PV /dev/sdb1   VG Mega   lvm2 [19.99 GiB / 19.99 GiB free]
  Total: 2 [39.75 GiB] / in use: 2 [39.75 GiB] / in no VG: 0 [0   ]
Next we need to increase the logical volume with the lvextend command (rather than the physical volume which we have already done). This means we will be taking our original logical volume and extending it over our new disk/partition/physical volume of /dev/sdb1.
Firstly confirm the name of the logical volume using lvdisplay. The name will vary depending on your setup.
root@Mega:~# lvdisplay
  --- Logical volume ---
  LV Name                /dev/Mega/root
  LV Size                18.91 GiB
The logical volume is then extended using the lvextend command. We are extending the original logical volume of /dev/Mega/root over the newer /dev/sdb1
root@Mega:~# lvextend /dev/Mega/root /dev/sdb1
  Extending logical volume root to 38.90 GiB
  Logical volume root successfully resized
If you like you can then run vgdisplay and lvdisplay again to confirm the size of the volume group and logical volume respectively, I have done this and I now have the following.
  LV Size                38.90 GiB
  VG Size                39.75 GiB
However if you run a “df” command to see available disk space it will not have changed yet as there is one final step, we need to resize the file system using the resize2fs command in order to make use of this space.
root@Mega:~# resize2fs /dev/Mega/root
resize2fs 1.41.12 (17-May-2010)
Filesystem at /dev/Mega/root is mounted on /; on-line resizing required
old desc_blocks = 2, new_desc_blocks = 3
Performing an on-line resize of /dev/Mega/root to 10196992 (4k) blocks.
The filesystem on /dev/Mega/root is now 10196992 blocks long.
Alternatively if you’re running the XFS file system (default as of RedHat/CentOS 7) you can grow the file system with “xfs_growfs /dev/Mega/root”.
Rather than resizing the file system manually, you could instead use the -r option of the lvextend command which will automatically resize the file system to make use of the additional disk space.
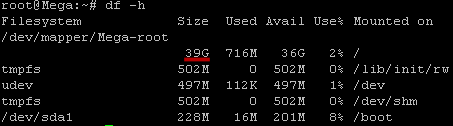
The resize took a minute or so to complete (it will depend on the disk speed and size), running the “df” command now shows the correct disk space for /dev/mapper/Mega-root
Summary
We have now increased the total disk space on the virtual machine by first adding a new virtual disk through VMware, created a new partition out of this newly unallocated space within the guest OS, turned it into a physical volume, extended the volume group, then finally extended the original logical volume over the newer physical volume resulting in overall disk space being increased successfully. This method allows for disk space upgrade with no down time, my virtual machine was not shut down or rebooted at all during this process. This is a very useful technique for upgrading disk space on production servers that can not go down.found at:
https://www.rootusers.com/how-to-increase-the-size-of-a-linux-lvm-by-adding-a-new-disk/
Comments
Post a Comment